How to Setup a Cron Job on Webmin?
CRON JOB
Cron job is the best way to automate various daily, weekly or even monthly tasks.In this tutorial, we will learn how to set up a cronjob on a server which runs Webmin.
Accessing Cron Job Configuration Section in Webmin
Step1: Login to your webmin admin panel.You can use by typing https://your-vps-ip-address:10000
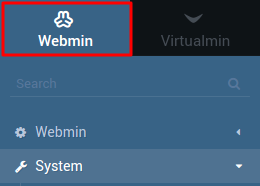
Step2:Choose Webmin between two options at the top of the sidebar.
Step3:Click System tab in the left sidebar of webmin and navigate to scheduled cron jobs.
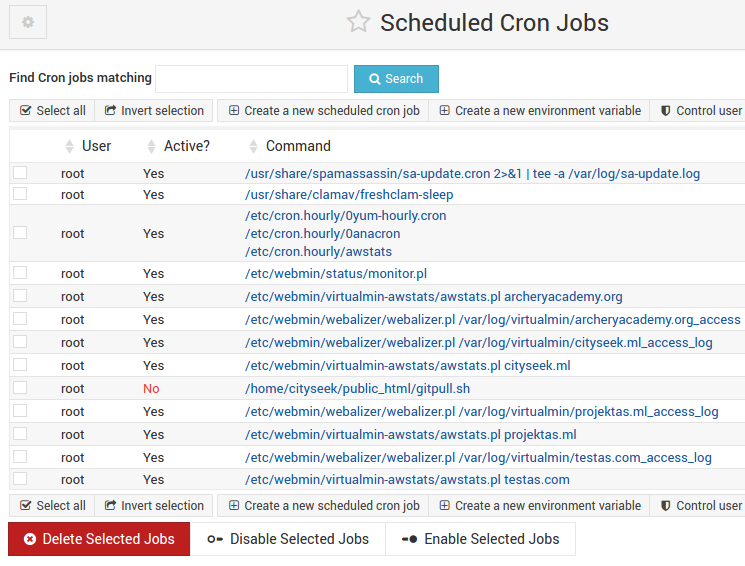
Step4: Now see a window with all of your scheduled cron jobs.
Creating a new cron job
Step1:Click create a new scheduled cron job in the top of the cron job list.
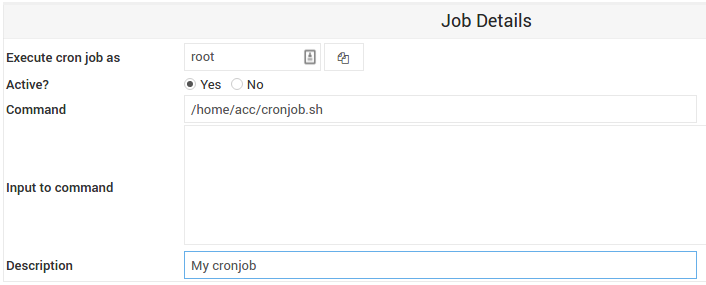
Step2:The next page nedd to configure cron job.The section is Job Details
Execute cron jobs
You must select which unix user to execute the cron job.By click button on the right side,will get full list of all available users on the server.
Active?
You can select whether Cron job is active or not.
Command
You will need to write command you want to run periodically.
input to command
This field is optional.It will be fed to the command as input when cron job is executed.
Description
Own cron job description (it is not required) for self reference.
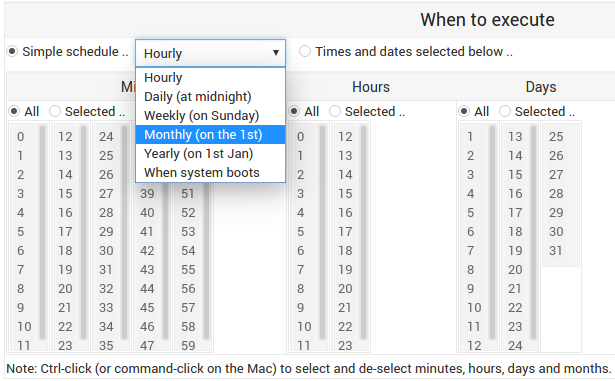
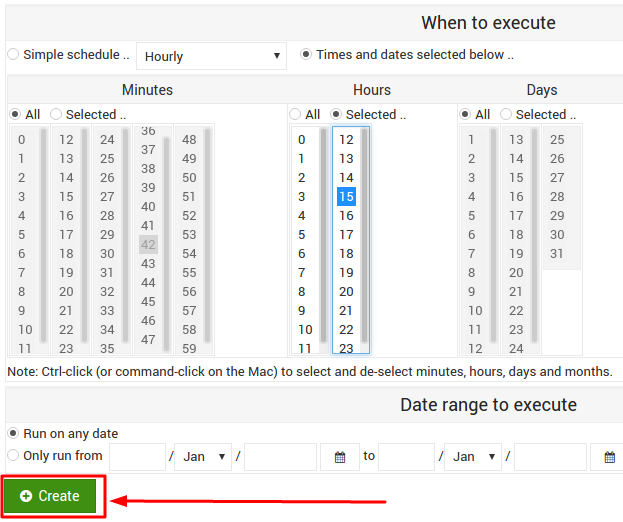
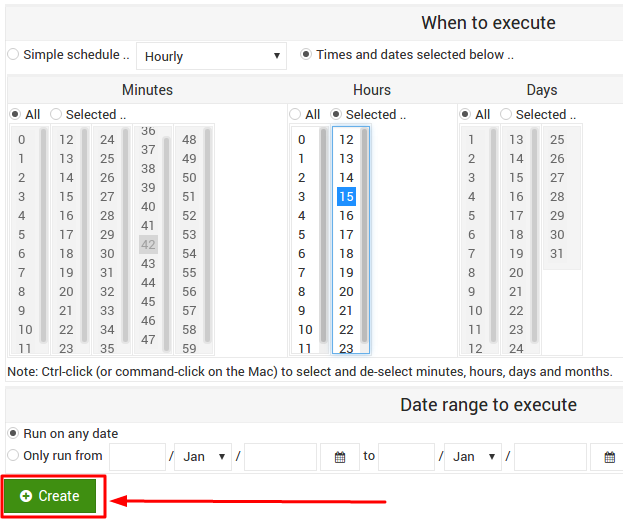
Step3:Next section is When to execute.Here you will be able to select when your cron job shoule be executed.There are two options.
SimpleSchedule-Select already defined interval from the drop down list.
Times and dates selected below-If you choose this option,you will have to configure the cronjob execution times by selecting minutes,hours,days and etc.
Step4:The final section is Date Range to Execute.Here you can set date interval if you only need your cron job to run for a week.two weeks or any other time period.
Step5:When you have everything configured as you want,to the bottom of the page and click Create.
Step6:If the cron job was setup successfully,you will see it in the list of cron jobs.

