What is know as Email Routing and how to set email routing in cPanel
Understanding Email Routing in cPanel
Email routing is a critical component in managing your domain’s email system. It determines how emails sent to your domain are directed to the appropriate mail servers. In cPanel, email routing allows you to control where email messages are delivered, which can be crucial for managing multiple mail servers or when using third-party email services. This guide will walk you through the concept of email routing and how to configure it in cPanel.
Table of Contents
What is Email Routing?
It refers to the process of directing incoming email messages from the sender’s mail server to the recipient’s mail server. This involves a series of steps that ensure that email is delivered to the correct location. The routing process is influenced by the DNS (Domain Name System) records, specifically MX (Mail Exchange) records, which specify the mail servers responsible for receiving email for a domain provided by your respective hosting.
Key Elements of Email Routing:
- MX Records: These DNS records define the mail servers that will handle incoming emails for your domain. They include priorities to determine which server should be used first if multiple servers are specified.
- Email Routing Settings: In cPanel, settings allow you to choose how emails should be directed, whether to a local mail server (on the same hosting account) or an external server (like Google Workspace or Office 365).
- Local vs. Remote Mail Servers: Local mail servers are part of your hosting account and handle email directly within the same server environment. Remote mail servers, on the other hand, are external to your hosting account and handle email outside your hosting infrastructure.
Setting Email Routing in cPanel
To set up routing in cPanel, follow these steps:
- Log in to cPanel: Access your cPanel account by navigating to
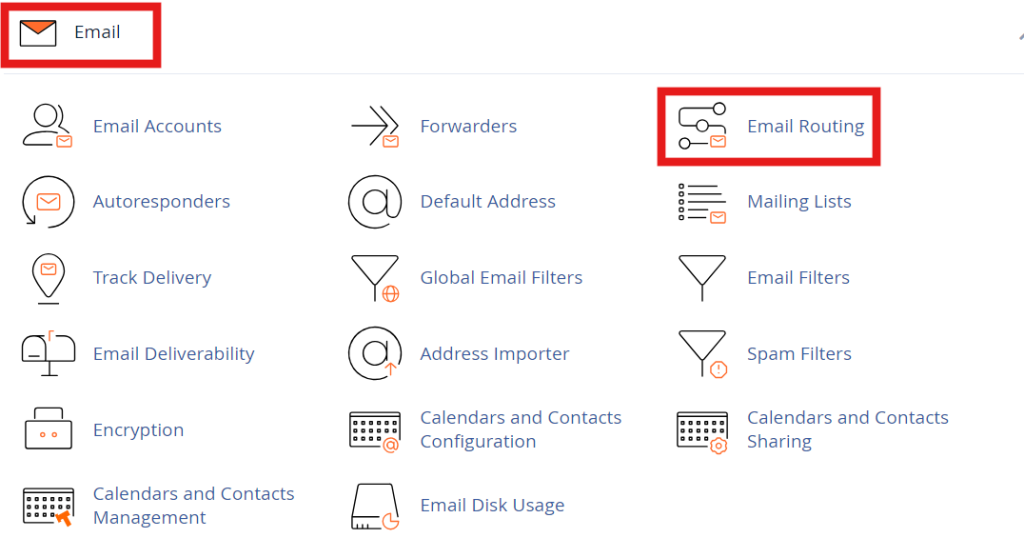
http://yourdomain.com/cpanelor through your web hosting provider’s control panel link. - Locate the Email Routing Section: Once logged in, scroll to the “Email” section. Click on the “Email Routing” icon to open the email routing settings interface.
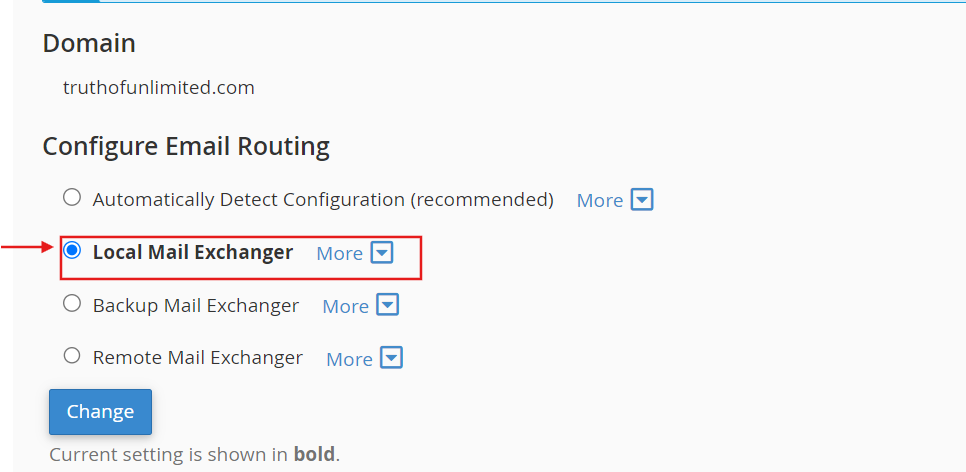
3.Select Your Domain: If you manage multiple domains, you’ll need to select the domain for which you want to configure email . This ensures that the changes apply to the correct domain.
Choose Email Routing Type:
You will see options for different types of routing. These options generally include:
- Local Mail Exchanger: Choose this option if your email is hosted on the same server as your website. This setting is used when your hosting provider manages both your web hosting and email services.
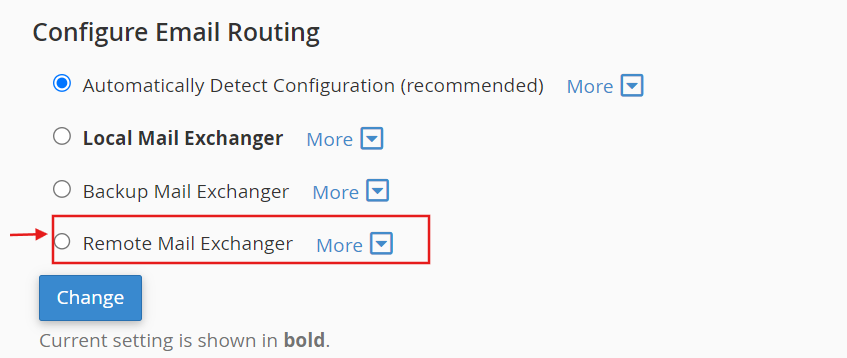
Remote Mail Exchanger: Select this if you are using a third-party email service like Google Workspace, Office 365, or another external email provider. This tells the system to route email through the external servers specified in your DNS MX records.

Automatically Detect Configuration: This option allows cPanel to automatically determine the appropriate routing configuration based on your DNS settings. It’s useful if you’re unsure which setting to choose.
- Update MX Records (if necessary): If you select “Remote Mail Exchanger,” ensure that your domain’s MX records are correctly configured to point to your external email service provider’s servers. This might involve adding or updating MX records in the “Zone Editor” section of cPanel.
- Add MX Records: Navigate to “Zone Editor” in cPanel, select your domain, and click “Manage.” Add MX records provided by your email service provider, setting the priority as specified. Save the changes.
- Verify Configuration: After configuring email routing and updating MX records, verify that everything is set up correctly. Use tools like MXToolbox to check your domain’s MX records and ensure they are pointing to the correct mail servers.
- Test Email Functionality: Finally, send test emails to verify that messages are being delivered correctly. Check both incoming and outgoing email to ensure proper routing and functionality.
Troubleshooting and Tips
- Propagation Time: DNS changes, including MX records, can take time to propagate across the internet. This may result in temporary email delivery issues. Allow up to 24-48 hours for changes to take full effect.
- Email Delivery Issues: If emails are not being delivered as expected, recheck your MX records and email routing settings. Ensure there are no typos or misconfigurations.
- Contact Support: If you encounter persistent issues, contact your hosting provider’s support team for assistance. They can help diagnose and resolve complex email routing problems.
Conclusion
Email routing in cPanel is an essential task for ensuring that emails are directed to the correct mail servers. By understanding the routing options and correctly configuring your settings, you can manage your email system effectively. Whether you’re using local or remote mail servers, the proper configuration ensures reliable email delivery and functionality for your domain.